Relief Printing

Relief printing is the process of applying ink to a printing block which is then brought in contact with a piece of paper. The block may be made up of many different materials such as wood or linoleum. The material the block is made of effects the grain and texture of the printing.
Steps
1. Transfer drawing to block
2. Decide if you are going to create a white line or black line printing
3. Carve the drawing into the block
4. Apply ink to the block
5. Put paper on the block then roll it through the press
Intaglio Printing
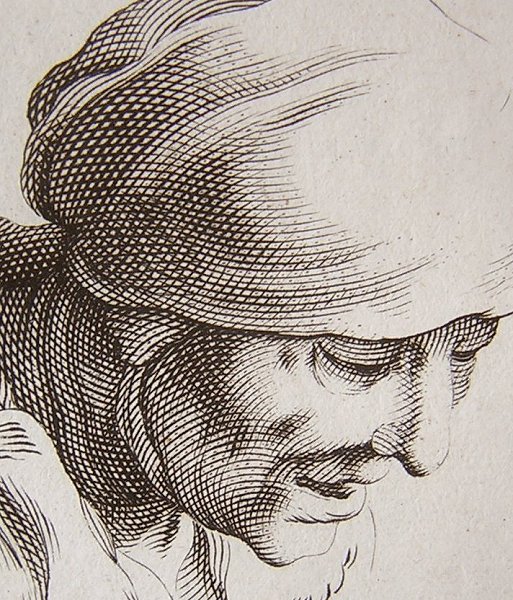 Intaglio printing is the process of scratching or etching your printing onto a metal sheet. The metal sheet gives the printing fine sculpted lines. The final printing also has raised ink and embossed edges.
Steps
1. Scratch your drawing onto the metal plate
2. Give your plate a steel face to protect your design
3. Rub the ink onto your plate
4. Use tarlatan to remove excess ink
5. Place paper on the plate and run it through a press
Lithography
 Lithography is the intricate process of using grease on a lithographic stone to create complex and beautiful prints. It’s one of the most complicated processes of printing because of all the stuff you have to do to treat the stone.
Steps
1. Draw on your lithographic stone using litho pencils or crayons
2. Buff the gum arabic into the stone with a cheesecloth
3. Rub lithatine onto the stone and
4. Apply water to the stone then immediately run ink onto the stone
5. Place damp paper on the stone and press it as many times as needed for the print to show up
Relief printing is the process of applying ink to a printing block which is then brought in contact with a piece of paper. The block may be made up of many different materials such as wood or linoleum. The material the block is made of effects the grain and texture of the printing.
Steps
1. Transfer drawing to block
2. Decide if you are going to create a white line or black line printing
3. Carve the drawing into the block
4. Apply ink to the block
5. Put paper on the block then roll it through the press
Intaglio Printing
Steps
1. Scratch your drawing onto the metal plate
2. Give your plate a steel face to protect your design
3. Rub the ink onto your plate
4. Use tarlatan to remove excess ink
5. Place paper on the plate and run it through a press
Lithography
Lithography is the intricate process of using grease on a lithographic stone to create complex and beautiful prints. It’s one of the most complicated processes of printing because of all the stuff you have to do to treat the stone.Steps
1. Draw on your lithographic stone using litho pencils or crayons
2. Buff the gum arabic into the stone with a cheesecloth
3. Rub lithatine onto the stone and
4. Apply water to the stone then immediately run ink onto the stone
5. Place damp paper on the stone and press it as many times as needed for the print to show up
Comments
Post a Comment